"before" pics show closed soffit which will be removed
 |
| Fixed narrow shelves ;o( |
 |
| North wall |
 |
| West w/ slider to deck(replace) |
 |
| SE corner |
 | |
| Nasty little plastic drawers |
21 cabinets in all, with 42 inch uppers (to the ceiling), dimming LEDs under-cab-lighting, granite counter and new slider.
Still waiting for a decision on the wood species, but the euro-style carcasses will be 3/4'" almond melamine. I'll use the 'ladder' support for base cabs to make it a little easier to keep them all level in this older house.
"Melamine?" you gasp. "But I thought you were a craftsman." Oh, get yourself out of the 19th century and accept we have some new products that perform better than the traditional methods. Melamine coated PB is stable, dead flat, easy to machine and rugged.
In addition, the light surface makes a brighter cabinet interior, it is easy to clean and doesn't require finishing. What's not to love? I prefer to spend money on the visible portions of the cabinet.
Research shows me that many good cabinetmakers use butt-joined melamine with Confirmat screws and a plant-on back. It reduces time tremendously by avoiding dado cuts. Let's us face it, the stresses on a cabinet are not great, and after screwing cabinets to wall and each other it's one big solid unit anyway.
If I had to transport the cabinets in my truck, I might not consider them quite as "bullet proof" as dado/glue/screw with plywood, but I just have to carry them upstairs.
In preparation, I am getting jigs and workflow set for the big job. Built a sled to allow perfectly square cutoffs of slabs of plywood or melamine. Nice design for the sled was in a back issue of FineWoodWorking mag. I will need some jigs for the Euro hinges and the adjustable shelving holes and will fine tune the mortising jig I built last year.
I will put together a stage for the melamine sheets that is close to saw so I can just slide the sheet to the saw without lifting it -- heavy suckers!
=================================
So we have a decision...the wood will be figured (curly) maple frames with a plain-sawn maple veneer panel finished with Polycrylic water-based urethane.
 |
| curly maple |
I have most of the carcass material done for the uppers, the test runs done for floating tenon mortices, and hardware ordered -- all Blum hinges and bottom mount drawer glides.
Blum 95 degree and 120 degree hinges for the most part, with the 60 and 170 on the corner cabinet double doors.
For drawers, I'll use the 21 in. Blum Tandem Blumotion undermount glides.
++++++++++++++++++++++++++++++++
I picked up 43 bd ft of some nice curly maple for $5.10/bf. Ready to start frames next week. Got an agility competition with Jack, my bench-dog, this weekend.
Drills and depth stops for shelf pins, confirmat pilot.

Mortice Jig for floating tenons:
Top, showing the Incra track and the opening where I just line up the mark the end of stile to be cut.
 | |
| Makita plunge router doing the mortice |
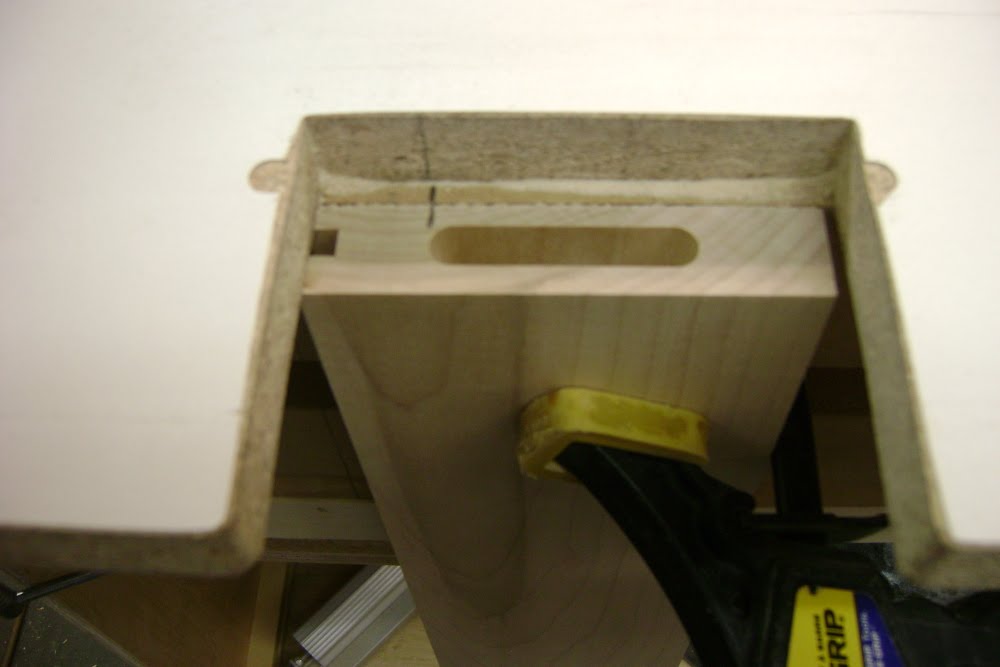 |
| finished rail mortice |
 |
finished stile mortice |
Now just cut a 3/8 floating tenon and plug it in. No messing with tenon faces or mis-cut shoulders.
Cutoff sled:
This holds carcass sides easily to cut square -- and repeatable with a Kreg track. The adjustable horse supports left side of the 48" sled...

 |
************
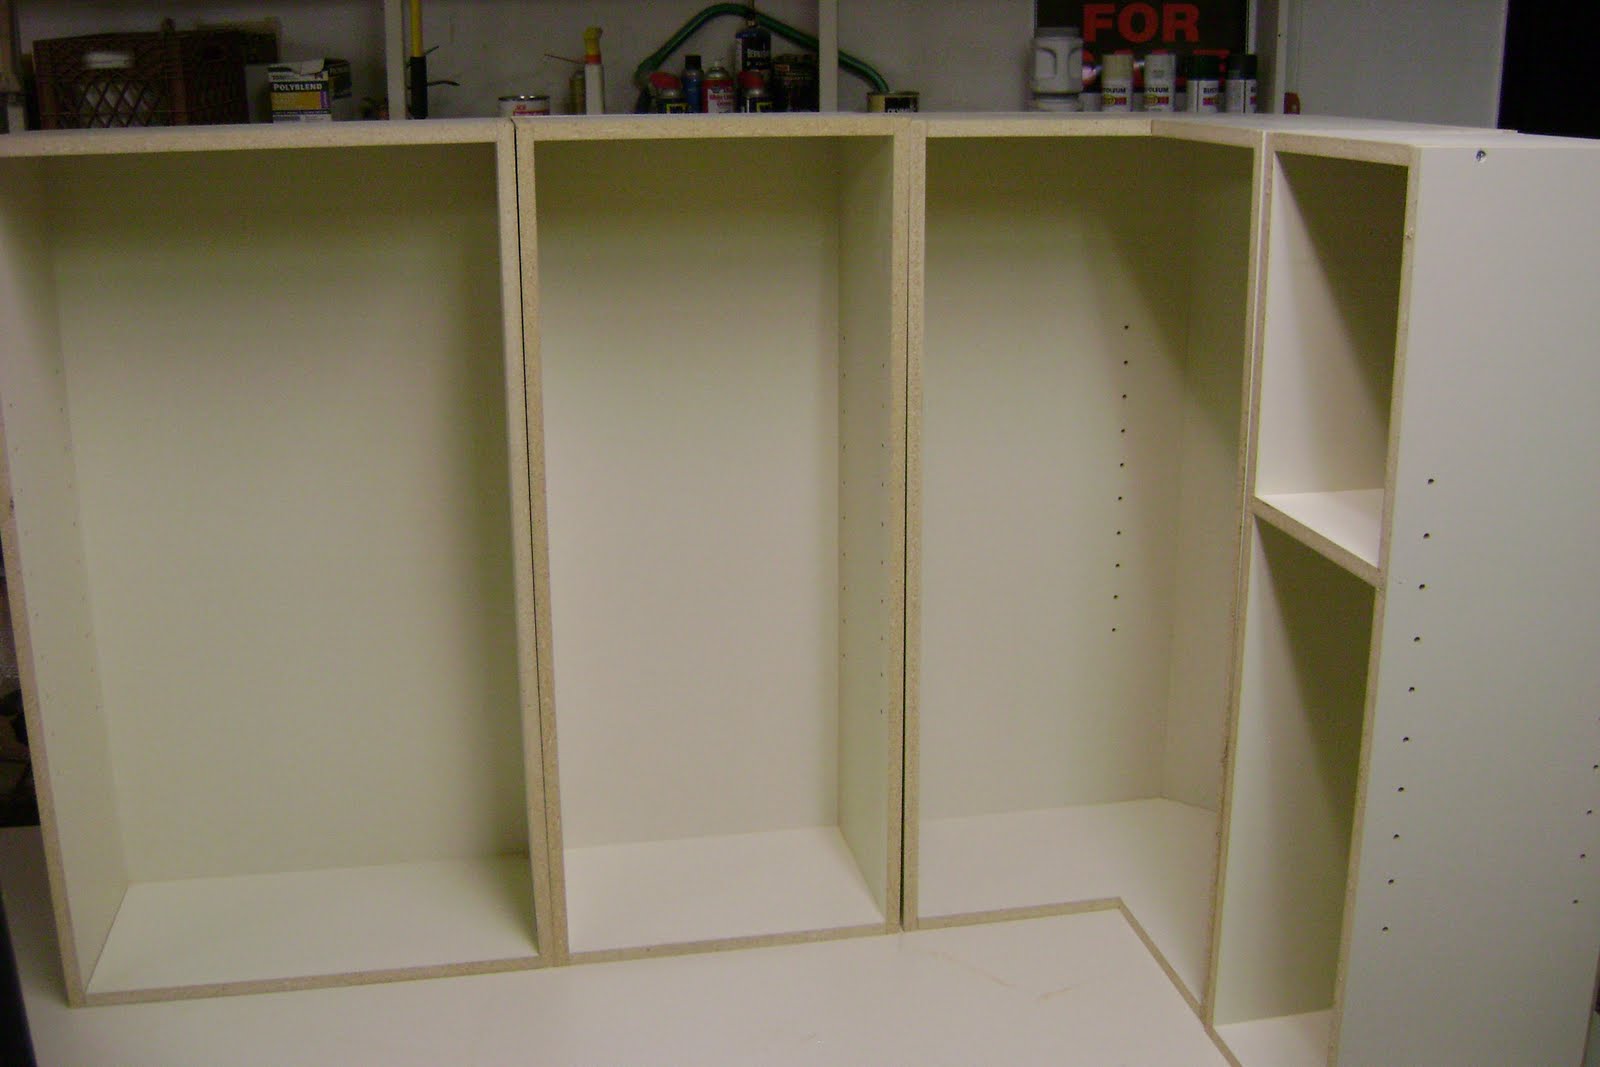
The upper carcasses are done. Still need to tape the edges and attach the cleats. The 7x50mm Confirmat screws with the appropriate step-bit are just great. I have to 'push-pull' the step-bit 4 times to get it done fast, otherwise the drill just slows down and burns the hole. Sounds worse than it is...only takes about 3 or 4 seconds to do it.
 |
| uppers East/So corner |
 |
| French cleat |
Getting ready to make doors with that beautiful curly Maple and decided to put some new knives on the planer for the occasion. Boy, the lumber came out smooth as glass and no tearout. The Dewalt 735 12 inch planer is a fine tool. It does a great job, and is very easy to change blades.
I did see a little tearout when I flipped the door frame parts on edge to gang plane them. Probably because I took a little too much off. Another pass fixed that.
Tonight, I will try to get all the rest of the upper cabinet doors cut and morticed. If I'm lucky, my assistant will start applying the edge tape, and I can move on to the base cabs.
Aug 10 -- finished sanding the doors for first four cabinets. Before starting the next set, I am waiting for a new bit. I didn't like the depth of the floating tenons, so will go for 1 1/4 inch. However, I got the edge banding on all but two of the uppers and all the parts cut for the rest of upper door frames.
With the timely addition of the new drill press, we'll be in good position to finish up the first phase by next week.
 | |||
| Sanded curly Maple door |
This view doesn't really show the curly grain, but boy, it's there. At least you can see how nice that floating-tenon joint is.
Aug30 2010
We spent time this weekend at the State Fair doing an Agility demo with the dog club, but I managed to get three base cabinets finished and a fourth ready to screw together. Still waiting for the new mortising bit, but I have plenty of work to do on other things ;o)
I found that it is much easier to tape, trim and sand the edges before assembling the carcass.
 |
| Bases closeup |
 |
| Bases |
Sept 1, finished the carcases and reengaged the door construction. Time to think about drawer construction too!
Thanks to Craigslist again, I snagged a new Performax 16-32 drum sander to do the frame and panel doors. I've been waiting months for one to show up and it came just in the nick of time... Thanks again, woodshop angel. Price was only half of the street price--including feed-tables and locking casters. What a deal.
++++++++++++
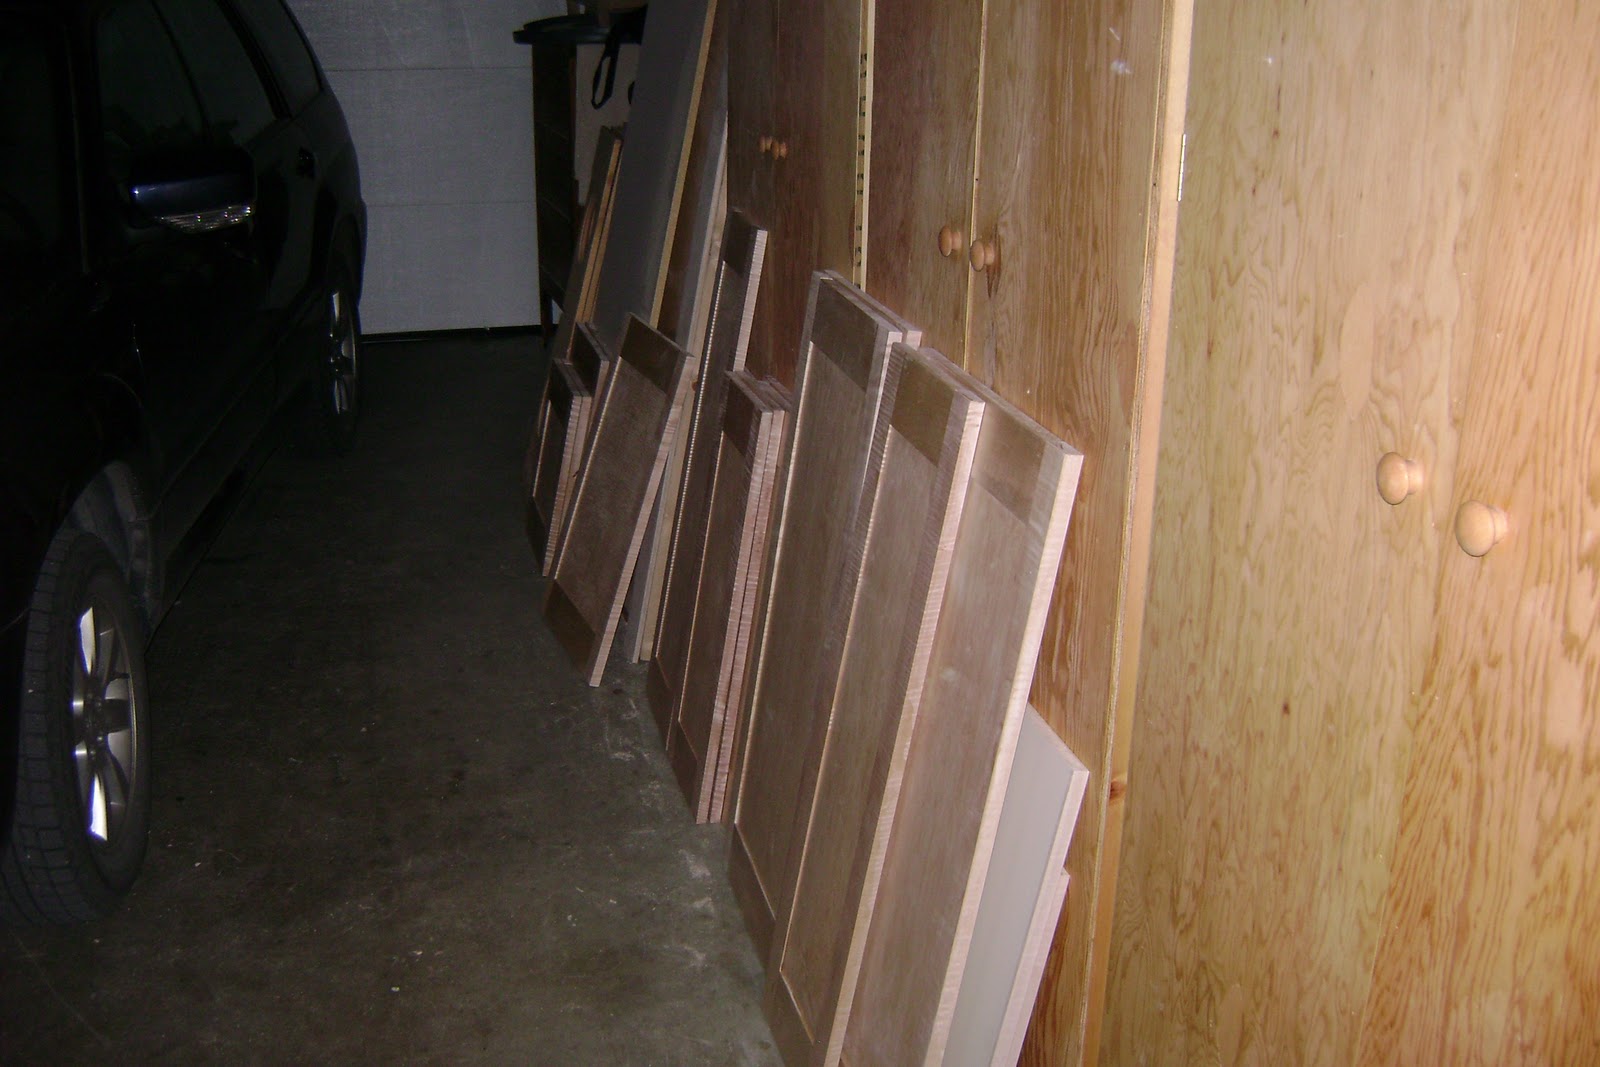
Oct 3, all doors are sanded and drilled for Blum hinges. We picked up the hardware for trash bins and tray organizer today and milled the stock for the 8 drawer fronts.
Next week I'll pick up the 1/2 in drawer stock and start that little project.
 |
| Twenty four doors sanded and ready to finish |
 |
| One of two boards for drawer-fronts |
Attached the Blumotion glides for both sets of drawer carcasses, and finishing up the pantry pull-outs.


Oct 25: Starting to get a little crowded in the shop...getting sealer coat on the 19 doors, plus finalizing drawer construction. Sure was great to have a three day weekend!
 |
| Drawer units completed |
 |
| Dry doors waiting to be 'hinged' |
 | |
| More doors and the spice pull-outs |
 |
| Using a quarter to space drawer fronts |
 | |
| Jody rips out the first one with a big whoopee. |
 |
| SE corner all clear. |
 |
| Temp kitchen in dining room |
Nov 11... last load to the dump today! Now to start building a new kitchen... after removing the soffits, it looks like I might have to reroute some wiring, and of course replace some sheetrock. It's good to start the downhill run.
Not so fast there, sonny. Don't think the hard stuff is all over. Called an electrician to give me some idea of how to handle this mess.
 |
| SE corner |
 |
| NE corner |
 |
| South wall - lovely wiring ;o) |
Electricians evaluation: Rewire.
 |
| Ripped off drywall on North wall in prep for rewire |
 |
| Partial removal on East and South. |
I altered one of the cabinets, to allow the big 'home run' bundle to stay put. Otherwise, we would have had to put in a couple of electrical panels in to make junctions.
We did get a bid on the granite counter - gulp. Good thing we saved bigtime on the cabinet materials!
Took Friday off to be there when electrician and plumber came to do their thing. Before they arrived, I had the underlayment/linoleum ripped up and most of the nails pulled. I busied myself with some cabinet issues, and burning flooring until they left at 4. Then I installed new underlayment and had a beverage.
Saturday, I managed to get the new sheetrock up and just have some soffit areas to complete. Thanks to ibuprofen, I wasn't too sore to play guitar at church Sunday ;o) --and took the rest of the day off doing NOTHING!
Thanksgiving! Four days off and lots of time to work. The walls are sealed up and ready to start adding cabinets. Here are some test fits.
 | |
| Cab 1 needed a little rebuild to hide wires. |
 |
| ..Wiring home runs hidden by cabinet 1 |
 |
| Seeing how things will fit on SE corner |
The French cleats are pretty convenient for testing. Just hang 'em and step back.
Gosh, isn't it a pain in the butt when things don't go as planned
Shoot, I may get done before we leave for Christmas!

Finally have the 'corner from Hell' installed. Have to level the support structure for the base cabinets and I can get them in now..
Being so cold, and a few inches of snow on the roof, I'm not too excited about climbing up there and cutting holes in the roof. So the range-hood vent will just have to exhaust to the attic until Spring.
The base corner cab was too big to get through the door, so I took it apart and hauled the "kit" upstairs to reassemble. Kinda reminds me of the guy who builds a boat in the basement ;o)
Well, it's Christmas week and time to make and wrap presents, not build cabinets. Cabs all up now.
 |
| New range work area |
 |
| New sink, DW, fridge and pantry area |
That odd lighting is the afternoon Alaska winter sun...pretty hunh?
All doors up...and had to shorten the drawers to make them fit the Blum-motion glides, but all done. The granite installer was here to take final measurments, and Jody ordered the flooring. Looks like we might have a kitchen again by February.
 |
| Flooring installed -- |
 |
| Pantry shelves are a dream. |
 |
| Pull-out spice racks |
Granite will be installed tomorrow--on Jody's birthday! Good timing.
 |
| Sweet ! |
 |
| Peninsula |
I hate to admit it, but I never considered the handles on stove when I designed the peninsula drawer set. After installing the range, I saw I couldn't get the drawers open! And 300 lbs of granite are sitting on top of the cabinet. Do we call the granite installers to undo their work while I move the cabinet out 3 inches?
No, we solve the problem by ourselves. I tapped a dozen little maple wedges in to separate the rock from the Liquid Nails on the cabinet top. Once it was free, I used $7 worth of 2x4s and a bottle jack as a lifting mechanism which brought the granite up about 1/4 inch and just slid the cabinet over. I needed to make new filler pieces, but when I dropped the rock back down, you could never tell what happened!
I will do the plumbing for ice-maker, dishwasher, reverse-osmosis filter and rest of the sink stuff before the SuperBowl. Then, maybe a little rest.
2/25/2011 Officially completed.

Remember this?
|
| GOOD RIDDANCE ! |
2 comments:
So, I think I'll just give you a new nic name or maybe a thought for a new TV show....
"New Alaska Wood Shoppe"
Oh how I wish I had my toys again... Great job Russ!
Thanks, Chuck. Wait until I'm done, to say "great job" ... you may change your mind ;o)
Post a Comment